Jump to content

Eracer_Team-DougH

Members
  • Posts

    1,056
  • Joined

  • Last visited

  • Days Won

    150

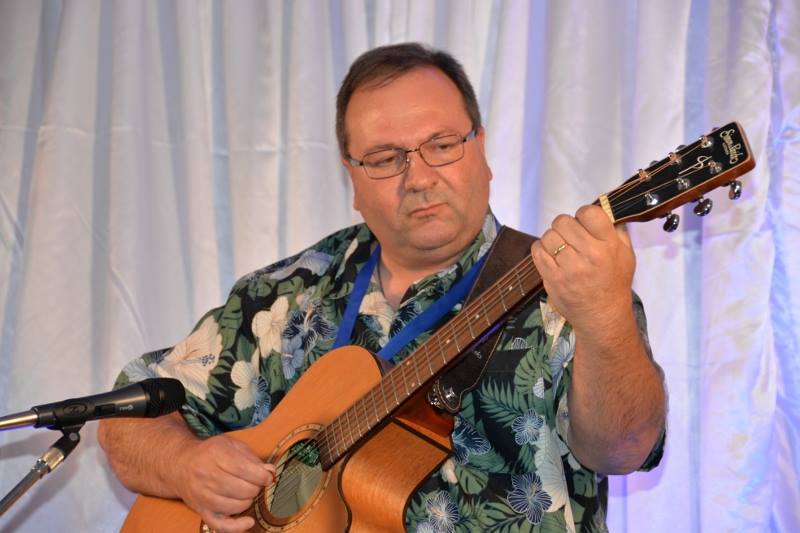
Everything posted by Eracer_Team-DougH

  1. Sounds like the store took you for a ride. Nothing to do with a string change. Sorry to hear how bad store took you and money Btw Greg Voros of Gruhn's does great job and may help in the price of repair
  2. Action was way high. Lowered it last night. Then had to do a intonation as it was out several steps. Have a fret buzz on 6th fret only. 5th and 7th fret notes fine. I think a bit of bow into the neck via truss rod might help with the 6th fret buzz
  3. I got a hat and dark glasses. Although that fingering of Em7(b5) at the 12th fret is a twist up for my fat fingers
  4. I name mine.. Strat.. Les Paul.. Acoustic.. Sheraton.. etc.. no fancy names..
  5. Well as you read in NeilES335 post he had a "new guitar day" well I had one sort of the same day via Neil.. we were tossing back and forth the Long and McQuade 'scratch n dent' inventory blow out listing (Think Guitar Center but better,, and you can rent high end guitars (ie Gibson J454 or Martin D28) for like $130 month) they put together their inventory, each store has selected what they would like to move.. not all deals are great. you might get $150 off a Gibson Les Paul or something like that.. and apparently there is some sort of line up policy I didn't' know of but good thing Neil found out. I just happened that Neil doesn't live too far from me or the store we shop at and it had at least 2 interesting guitars to look at. Neil lined up early in the morning 2 hrs before the store opened so he could get his number to enter when they did. he called me about the Epiphone Sheraton he thought I might like .. actually I was thinking of an ES-137 .. but the Sheraton is a very good deal. the Sheraton is the Chinese version of the Gibson ES-335.. very similar in all respects so he grabbed the Sheraton for me on Friday and some how managed to get them to toss in a hard case for it.. so the deal got even better. (now how to tell the wife about another guitar ) Neil had both guitars till I could get over on Sunday.. Neil has probably played this Sheraton more than I have at this point.. but Neil thinks I need to learn how a cat runs across a fret board. at least if I make a mistake in guitar.. I can call it Jazz... (I'm even too lazy to take my own pictures.. so I used the ones that Neil sent me ) Your guitar was made at the Qingdao Plant (Epiphone), China on July, 2014 Production Number: 1479 FEATURES Body Body shape: Double cutaway Body type: Semi-hollow or chambered body Body material: Laminated Top wood: Not applicable Body wood: Maple Laminated Body finish: Gloss Orientation: Right handed Neck Neck shape: '60s SlimTaper Neck wood: Maple with walnut Joint: Set-in Scale length: 24.75" Truss rod: Standard Neck finish: Gloss Fretboard Material: Rosewood Radius: 12" Fret size: Medium jumbo Number of frets: 22 Inlays: Block and triangle Nut width: 1.687" (42.8mm) Pickups Configuration: HH Neck: ProBucker 2 Middle: Not applicable Bridge: ProBucker 3 Brand: Epiphone Active or passive: Passive Series or parallel: Not applicable Piezo: No Active EQ: No Special electronics: Volume controls with coil tap Controls Control layout: Volume 1, volume 2, tone 1, tone 2 Pickup switch: 3-way Coil tap or split: Coil tap Kill switch: No Hardware Bridge type: Fixed Bridge design: Tune-o-matic Tailpiece: Stopbar Tuning machines: Grover Rotomatic Color: Gold Other Number of strings: 6-string Special features: Pickups, Vintage "Large Clipped Ear" with Mother of Pearl "Vine" Inlay Case: Sold separately Accessories: None Country of origin: China
  6. I put my pin on a Tim Horton's coffee shop not too far away from my house. You get a rough idea where I am without being specific
  7. Funny Except Jazz should say.. cat running across piano
  8. In the student guide (main guide not bonus resources). It tells you which CD and which track to play with
  9. I know there is overlap with Gerard's posts. But I didn' have time to sort all his posts to what was in my file. I didn' post it all as I knew so of the duplcate posts jumped out at me. Sometimes things need to be restated
  10. Session 11 - need practice guidance Pentatonic scales are a big batch of knowledge that will take some time to learn and digest and eventually put into your playing. Most guitarists learn a pattern or two and play them up and down and think that they have learned all they need to know about pentatonic scales. That's a bit like saying... "I know the alphabet. I can say my ABC's forwards and backwards. I don't understand why I'm not a great novelist by now." So, in the book I give you several steps in your learning of these scales - to get you from learning the alphabet to actually using it. - Practice all of the pentatonic forms ascending and descending -practice the pentatonic forms in all of the keys -practice connecting them together to play in all the keys the full length of the guitar -practice the common pentatonic patterns -Practicing soloing using pentatonic scales on A Minor Pentatonic Blues, G Major Pentatonic, and Aroud the Pentatonic World. Make up your own solo using the scales suggested. Let's go through these. STEP 1 - PRACTICE ALL OF THE FORMS ASCENDING & DESCENDING Start off by learning the fingerpatterns of the forms. Here's how to practice this. Pick a form. Play it slowly and carefully up and down. Each time you make a mistake go back and do the whole form again. You need to teach your fingers the correct way to play the form. Once you can play the form up and down perfectly with consistency. Then move the form up a half-step and do it again (up and down). Don't worry about knowing what key you are in yet, just focus on playing the form accurately. Work your way up and down the neck playing the scale at a slow to moderate speed. Once you have really learned one form then start learning another form using the same process. This process, if done correctly, should take around 2 weeks. When you can play all five forms (ascending and descending) with confidence and accuracy then move to the next step. STEP 2 - PRACTICE ALL OF THE FORMS IN ALL OF THE KEYS Now, its time to move past just playing the finger patterns and begin to assimilate these finger patterns with their associated keys. Each pattern has an associated major and minor root (as shown on the diagrams). So, let's start with the key of C. Play each of the five pentatonic forms ascending and descending in the key of C. You want to start with the form that can be played in the lowest position. Don't start with your favorite form and then figure out the others. Force yourself to learn where each form is on the neck. So start with whatever form is the lowest one in that key on the neck. Then move up the neck switching forms as needed. When you get higher on the neck you will need to flip back to forms you previously did only now they would be an octave up. Once you can play all of the forms on the entire neck in the key of C, then move around the circle of fifths keys. So, they would be in this order... C - G - D - A - E - B - F#. F - Bb - Eb - Ab - Db - Gb. This exercise when done properly should take you, at least, 30 minutes to get through all of the keys. STEP 3 - PRACTICE CONNECTING THEM TOGETHER TO PLAY IN ALL KEYS THE FULL LENGTH OF THE GUITAR Look at the Bonus Resources Book pgs 104-107. These are the patterns that I want you to play in all keys the full range of the instrument. Pick a key. Identify the form you need to use to play at the lowest part of the neck. Play that form ASCENDING, then move up to the next form in that key and play it DESCENDING, then move up to the next form in that key and play it ASCENDING and so on, until you run out of neck. Then work your way back down in a similar way. When you get back to the bottom of the neck again, then move on to the next key and do it all over again. Choose your keys in the cycle of the circle of fifths as outlined above. This should take you about 2 weeks to learn this and will take you at least 30 minutes or more to do this and go through all of the forms in all of the keys. STEP 4 - PRACTICE THE COMMON PENTATONIC PATTERNS OK, now that you've gotten enough practice on the forms and how they relate to each other in different keys, now it's time to move beyond just playing them up and down. You need move beyond viewing these scales in a linear (up and down) fashion. In the lesson book I outline several common pentatonic patterns. Pick a pattern and learn the basic idea. Then pick a pentatonic form and play the pattern ascending and descending. Go to the next pentatonic form and play the same pattern up and down until you've worked through all of the five pentatonic patterns. Move to different keys, different parts of the neck. Play them in a connected form shape (ascending in one form, descending in the next). Once you can do this with one pattern then try the others. This should take you about a week to learn and at least 45 minutes to go through all keys and all three patterns. STEP 5 - PRACTICE SOLOING USING THE PENTATONIC SCALES Now that you've learned the forms, what keys they are in, where they are on the neck, how they connect to each other, and several helpful patterns to play with them, you should be able to look at the entire neck of your guitar and immediately see this grid of connecting pentatonic forms which will form the basis of which notes you can choose from when you are soloing. Now from this grid of appropriate notes you have a palette of notes to choose from when soloing. Begin experimenting, using the play-along tracks, trying to play different melodic ideas using the pentatonic scales. Play them in different parts of the neck. Don't always start with the same form. Vary the forms up. Vary the area of the neck that you start your ideas from. You will sound clunky and bad at first. Keep trying. Eventually you will start to make better and better musical choices. This takes a few weeks to a lifetime to do this with as much accuracy as you need to. The goal is to be able to play through your fingers the ideas in your head. If your head can think it - your fingers can play it. That's the goal. So, as you can see, there is quite a bit of material there to work through regarding pentatonic scales. It's not easy but it's one of the most important skills you need to have as a guitarist for soloing and knowing the neck of your instrument. This whole process took me about 3 months to learn and I use it every time I pick up the instrument. - Steve
  11. Yes, the G2 in that example is a moveable form. BUT, your reasoning behind it is right on the money. Here's the rule.... A G2 is made up of the notes G-A-B-D. Those are your ingredients. And, just like most menu items at Taco Bell, you can take those ingredients and mix and match them in a variety of ways and you'll still end up with a G2. As long as the chord, any chord, is made up of a G-A-B-D - in whatever order, or octave, or combination of notes - then it is a G2. With that in mind, you see that there are a myriad of ways that you can think up to play a G2. Some of the most creative sounding chord voicings have a moveable chord somewhere up on the neck combined with an open string or two. So, you're idea of putting the high A on top is absolutely correct. As the color tone, the A would sound better higher up in the voicing generally anyway. Don't be bound by just thinking of a chord as just a picture in a book - think of it as a collection of notes and sounds that can be manipulated. That's one of the things that really bothers me about the "Here's the Mel Bay Chord Bible thick book filled with 1000 chord shapes" approach. Yes, a book like this gives you a quick answer to what a G13b9 is BUT it doesn't give any understanding to why that chord shape is what it is. To change the metaphor... It's handing you the fish, and not teaching you how to fish. So, you are forever doomed to coming back time and time again to find this or that chord.
  12. Question about Rests- Do we silence the note or let the note being played ring through and play nothing for the period of rest? Great question. (Also, it looks by the time of this, that both of us can't sleep.) There's a peculiarity about the guitar. When you play a note on an open string, it continues to ring. But when you play a note that is fretted, it stops as soon as you take your finger off. So, when you are playing a rhythm that has a rest but the previous note is an open string, then the string just continues to ring right through the rest. What's a poor guitar player to do? So, here are your options on the open string ringing problem. You could quickly mute the string either by using the palm of your picking hand or a finger on the fretting hand. Anything will work as long as you lightly touch the ringing string. BUT here's my professional advice after teaching for way too many years... Don't worry about it. Here's why. When you're just starting out, you tend to play rhythms and exercises very slow. Going this slow lets you really hear how one string is ringing out more than the others. (And it bugs you so you think something is wrong.) So, you try to mute it somehow and your already stressed out motor skills get even more stressed out because now you have to worry about not only picking the note, but muting open strings that ring. BUT, As you get quicker and you have been playing a bit longer, then you are moving faster and the once ringing string is often muted quicker by another finger or note needing to be played. Hence, the open string ringing is much shorter and less bothersome. So, my best advice is.... Don't worry about it. If the open string really bothers you then, if you can, try to lightly mute it. But don't overly worry about it. The overall main idea as you're playing the exercise is to play the music in the proper rhythm and count the rests correctly. This "Open String Ringing" problem is really only one that gets bothersome to students right around the developmental level that you are at. And quickly you are on to other concerns. I hope this helps. It sounds like you are off to a great start. Keep going. There's much music to be made! - Steve Some strings (the open ones) ringing longer than other ones is part of the overall guitar sound - and it's actually a good thing. It's one of the parts of the guitar sound that makes it unique. It's even a desirable thing as you get more involved in your playing. Some of the coolest things you can do in your playing involve playing something that some notes are cutting off while others are sustaining. It's a uniquely guitar phenomenon - and it's a good thing. Mute it if it bothers you, but otherwise, don't overly worry about it and in a few weeks you'll be moving faster and it won't bother you as much.
  13. Down Strum - Up Strum - - - - WHAT!!!!??? In general, when playing eighth notes the picking is a down-up-down-up pattern with the downstrokes being on the downbeats and the upstrokes being on the upbeats. For example if I was counting a measure of eighth notes or "1 and 2 and 3 and 4 and" the beats would be the downstrokes and the "ands" would be upstrokes. Now, this is not a hard and fast rule. In some musical situations and some string combinations it may be more comfortable to adjust this pattern as needed. So, don't get too bent out of shape if this is varied occasionally. Now, regarding me occasionally playing through an exercise using all downstrokes. Yep, I do this sometimes. Sometimes it is just to overemphasize the rhythm of the notes or sometimes I'm just going for a more solid sound that downstrokes provide. I guess my overall point is that guitar playing is not math - with only one possible solution. In real playing situations there are constantly changing variables. Variables of how you want to play and attack the note depending on the strength of the sound you want to produce and so on. When you are just learning how to play this may appear confusing. But as you grow (and you will grow) in your skill you realize that this is a natural and freeing part of expressing on your instrument. Making music in general and guitar playing in specific is a wonderful combination of art and science. You can't analyze it as all rule-governed science, it just doesn't work that way. - Steve What to Do When You’re Frustrated and Stuck? · Beware when you are feeling stuck and remember that stopping is the enemy. · Plateaus are a natural, normal, expected part of the learning process. · Some things that help… o Relax. Nothing works right when you get uptight - especially learning. Don’t take the “stuck feeling” too seriously. Chances are nothing is terribly wrong. You’re just in a plateau. Just keep doing what you are doing - whether you feel like it or not and evaluate it again in two weeks and see how things have progressed. o Take a Short Break. Sometimes after beating your musical head against the wall for a considerable amount of time with decreasing amounts of progress, sometimes it’s just good to take a break for a few days, put your guitar in its case, and come back to it after a short time. BUT, don’t forget about it and break for too long or you will start to lose ground. Two or three days is a good amount of break time. o Practice Something Else for a While. There are many ways to get the job done and guitar skills tend to interconnect in various ways. If you’re stuck on barre chords then work on something else for a while and come back to them again in a couple of weeks. Often times this break has a magical quality to get you out of your stuck position. o Put Yourself in a Playing Situation. Nothing shakes the cobwebs of learning loose better than getting out of the practice room and into a playing situation when you are applying those skills. o Get some Fresh Musical Inspiration. Go to that concert, or go hear some live music, buy and download that CD from your favorite band, or get a new piece of gear. Getting new musical inspiration doesn’t need to be expensive - it just needs to excite and musically engage your heart again. o Be a Student of How You Learn. Learning is something you are going to be doing a lot of. Stop and think about the things that help you learn and those things that hinder or distract how you learn. Think about when during the day are you the most mentally engaged and try to practice during more productive times. Analyze the feelings you are having. Would practicing in longer, more focused times be better or would breaking your practice time up into shorter bursts of learning fit your style better? Think about how you learn and adjust your practice times to make them the most effective. o ABOVE ALL ELSE - DON’T STOP!!! Take a break if you need to, press on if you need to, try several different things, but don’t listen to the inner voice that says “Well, I guess that’s it. That’s as far as I can go as a guitar player.” That little inner voice plays in all of our heads and it just might be lying to you.
  14. LEARN FROM EVERYONE AND EVERYWHERE YOU CAN Learn from me, learn from your neighbor down the street, learn from the good folks over at Jam Play and anywhere else you can find to learn. Not one course will have it all. (Despite what our very own "over the top" marketing claims say about the course. More than once I have had heated conversations about the educational ridiculousness of "everything you need to become a guitar master in one box" claims.) You're going to need every bit of wisdom and insight that you can get from any source you can to get you to be the player you want to be. The biggest factor in your guitar education is not my approach, or someone else's approach, but is you - your dogged determination to learn. Read this... ONE OF THE MOST IMPORTANT SECRETS TO LEARNING GUITAR Learn from everywhere you can find to learn from. Let me also say one more thing. Learning is a verb - an action - an action that is taken on by the student. The teacher can only present the information. The responsibility is on the learner to reach out and grab that information, work on it with determination, and ultimately benefit from it. So, REACH, and LEARN!
  15. How to learn the notes above the first position It sounds like you are doing exactly what I would suggest which is play the songs and exercises for Sessions 1-4 in the 5th, 7th, and 10th position. Already knowing the melody will help even more to make the connections with the notes and their placements within those positions. Then try making up a simple melody and play it in the open, 3rd, 5th, 7th and 10th positions. These are all great exercises for ear training and learning your notes. - Steve Too many view the practice room as a prison - a place of endless, fruitless frustration and toil. It's seen as a place to be avoided at all costs - a place where your inadequacies are placed in the spotlight. Any distraction is readily embraced to divert us from the cruel, unforgiving mirror of our frail abilities found in the practice room. Many musicians are enslaved to this view of the practice room. If you are in this unfortunate mindset, let me offer you a small alternative view of the practice room universe. With a different perspective your practice room can move from a prison to become a sanctuary - a place where you quietly go to remember who you are, what you love, and who you want to become. Practicing, and the daily "bettering" of your skills (and thus yourself) yields tremendous benefits beyond the specific skills that you are working on. The time you spend with your instrument is special - it's a time where you put away the other cares of the day and focus entirely on something that YOU want to do. Practicing is something that you do for you - not anyone else. So many of the hours in our days are invested in things for other people but practicing is something you do completely for yourself. Learning is valuable - it is a sacred investment of your time purely for your own benefit and enjoyment. The practice room is a place of trials and triumphs, a place where you are challenged mentally and physically, tested to the depths of your understanding and ability. And a place that on some very special days you walk out of as a conquerer. The practice room is a place where your dream of making music is forged - like a blacksmith working with steel - a place of heat, sweat, and where every inch of progress is not "cheap" but is earned through determined effort. In the end, people may walk past and say to you "Wow, you have really improved, you must just have a gift." But in your heart you know that any ability you have was not "dropped upon you" from the sky cheaply but was forged with great effort and determination in one place - the practice room. Many people dream of being a musician - some for years. But there is only one door that those that truly become musicians walk out of... the practice room. - Steve JACK!!!! Yes, that's him!!!! He died several years back and I'm sure he hated it. He was one of the most "full of life" people I've ever met. He was the only guitar teacher I ever had drop me. I was young and stupid - a "full of myself all-state guitarist" in high school who was bored stiff by this kind old man who tried to teach me a style of playing that seemed way too outdated and un-hip. What I would give for a few more lessons from this living jazz legend now. He told me "Why don't you come back when you have a bit more time to devote to the lessons." I walked out of his home and thought "how rude" but that experience and my time with him taught me several life lessons... LIFE LESSON #1: Don't think more highly of yourself than you should. Learn from everyone you can. I realized he was right to drop me. It was a waste of his time and mine. I was faking my way through his lessons. I thought "what can this old guy teach me". Foolish. LIFE LESSON #2: Don't rely on anyone to spoon feed you instruction. It's your job to reach out and dig for it - to claw it out. When I had lessons with him he never wrote anything down. So, it was all by memory and by the time I got home from the lesson I could remember little of what he taught me. (Ever had that happen...)Eventually, I started recording his lessons, but I still didn't take the time needed to grasp the concepts, and I wrote little down. Foolish. Most teachers in your life will give you little help in the process of learning. It's the student's job to dig for the learning - sometimes the teacher may help in this endeavor, sometimes not. I cannot blame the teacher for my lack of progress just because the teacher is making me dig for it. It's in the digging that you learn the most. LIFE LESSON #3: Chords can mean much more than the sum of their notes. Jack taught me that chords were not just for accompanying but that they can be used to harmonize a melody. He also taught me that a chord can function one way in one harmony and another way in another harmonic situation. I was used to analyzing chords as a slice of time - i.e. you look at what notes are in the chord and you can tell how they are functioning. Jack taught me to look at chords in context of the tune. For example, sure a G-B-D-F is a G7. But looking at the function of the chord can tell me that a G7 is the V chord leading me to a C - AND that that G7 can be preceded by a Dm, AND since the G7 is functioning as a V chord then I can alter it a variety of different ways and it will still make musical sense. Jack also taught me that a chord can be a chord without a root. This was a mind-blowing concept to this long-haired teenage jazz player. For example, the chord B-D-F-A-E seems like a meaningless grouping of notes. If I looked at it on the surface I might come up with some non-sensical analysis as a Bm7sus(b5) ???? It was Jack that taught me that a B-D-F-A-E is a perfect G13th - just without the G. And who needs the root anyway if the chord progression clearly indicates the chords function. This opened up a world of thought to me. Anyway, there is only one tune and a handful of licks, and a few key pieces of musical knowledge I can remember from those lessons with Jack. This is through no fault of Jack. I look back on that part of my learning and I think I was so clueless to what this man could teach me. He was a brilliant player and one of the best jazz guitarists of his day playing with world class orchestras and television bands. All I could see was an old man, in a small house on the wrong side of town. He died some years later, only remembering me as a clueless teenager who didn't have time for his lessons. Never knowing the impact he had on me and now on you. - Steve How not to dig into the strings too hard while strumming Quote 1) Relax your wrist. As you speed up your strumming you need to relax your wrist so that it doesn't become too stiff. 2) Use a thinner pick. When you're doing a lot of strumming a thick pick causes you to dig in too much and will eventually cause too much resistance against the strings. Thinner picks work better. 3) Hold pick securely but with some flexibility. I realize that this sounds like a contradiction. And I guess it is in some sort of way, but in my mind this is what I do. I hold the pick firmly enough so that I have a good grip with strumming aggressively BUT I also am, ever so slightly, loosening the grip on the pick occasionally so that it has a little bit of give in it. I'm still in control but, giving the pick some flexibility when needed by adjusting my grip on the pick helps. 4) Don't use too heavy of strings. Use light strings when you are doing a lot of strumming. It will save your arm. Stiff strings, like a stiff pick, just adds resistance which is unhelpful when strumming for long periods of time. I hope this helps. - Steve Here's my official words of advice from decades of playing experience and teaching experience. Are you ready? Lean in so you can get a good look at it...
  16. When to use a "Lick" THE SHORT ANSWER: A lick's "usability" depends significantly on the musical context. What may work in one setting may sound awful in another setting. THE LONG ANSWER In your "notes are letters, licks are words" analogy, let me adjust something. Notes are letters, but licks are more like phrases than words. A word generally has one specific meaning but a phrase is much more dependant on context. And that's how it is with licks. For example, the phrase "Hey, buddy, you stink!!" may mean: "You don't smell very good." but it also could mean that "you're guitar playing needs some work." That's how it is with licks. For example, I could play a classic Stevie Ray Vaughn lick on my blues gig and people go wild. But I could also play the identical lick over the identical chords the next night at my jazz gig and get strange looks from everyone. THE MORAL OF THE STORY I wish a certain set of licks would be guaranteed to be great in any setting but it doesn't work that way - you've got to listen and use your ear as to what might work. That's why books like "100 Great Blues Licks" can only take you so far - you still have to apply those and adjust them to fit into a variety of musical settings.
  17. Reason for Naming the Pentatonic Patterns the way I did: Yes, you are absolutely correct. There doesn't seem to be a consensus on how to name the various pentatonic forms. The only reason I labeled my 1st form instead of, let's say the 5th form, is because the shape I am using for the 1st form is the one that everyone knows. So, I just called it the 1st form and went from there. There is also confusion because of the major/minor root relationship. Truthfully, when I'm playing I don't think of the patterns as "1st form", or "2nd form". (I had to teach them with names because there was no other way to convey the concept) But when I'm playing I relate all of the forms by the root and the other scale steps. The main ideas with them is that... There are 5 pentatonic forms that progress from one to the other in a specific order that cycles. In other words, I can have the alphabet letters A-B-C-D-E, or I can write them C-D-E-A-B, or E-A-B-C-D but you can see that Cs are always after Bs and Es are after Ds. And after five letters it cycles back no matter where it starts in the pattern. So, it really doesn't matter whether I call it the 1st form or not as long as you understand how they are fitting together and cycling. Regarding the diagram, I just wrote it out how it made sense to me and how I visualized it on guitar. (And it never really made sense to me why on a diagram people would put the 1st string on top and the 6th string on bottom.) I hope this helps. I will try to address this during the live lesson for next week (Feb 21, 2012). Perhaps I can clarify it a bit more then.
  18. QUESTION 1 - WHAT IS A DIMINISHED 7th CHORD? "..have come across to things I don't understand. ...I see often diminished 7th but thinking back to session 9 I thought only the 4th, 5th and octave (perfect intervals) can be diminished and not the 2, 3, 6, 7th (Major intervals) which I thought could only be minored?" The short answer: The word "diminished" in the chord name is referring to the type of triad, not the interval. The long answer: Chord names can get a bit confusing. Chord names generally have THREE parts - the ROOT, the TRIAD TYPE, and the EMBELLISHMENT. For example in the chord Cm7 (C minor seventh), - "C" is the Root - "m" is short for "minor" and that tells you that it is a minor triad - "7" tells you that to add the flatted 7th step of the scale (remember the flatted seventh rule) to the minor triad. (Remember, in a chord name a "7" (when it appears by itself) is always a flatted seventh unless it specifically says "major7") So, the "diminished" in the chord name is referring to the type of triad needed not the specfic interval of a seventh. So, the chord in question would be built on a 1-b3-b5. Now, let's go on to the next question... QUESTION 2 - WHAT ABOUT THE 7TH? in the song "The Godfather" you have unknowingly stumbled across a rather complex harmonic concept that is going to take a moment to explain. The short answer: The formula for a (half) diminished 7th chord is 1-b3-b5-b7. (You'll notice that I assumed a half-diminished chord was needed instead of a fully diminished chord even though the chord name doesn't specify it.) The long answer: There are two types of diminished seventh chords - HALF-DIMINISHED and FULLY DIMINISHED. (Learn & Master Guitar Lesson Book pg. 90) A HALF-DIMINISHED chord is 1-b3-b5-b7. (Basically, a diminished triad, with a flatted seventh added) A FULLY DIMINISHED chord is 1-b3-b5-bb7. (A diminished triad with a double flatted seventh added) So, why did I assume that the chord in question was a half-diminished when the chord name didn't specify it? This brings us to question 3 about chord functions in minor keys so let's look at that first. QUESTION 3 - CHORDS IN MINOR KEYS - WHY DOES B7 WORK INSTEAD OF Bm? The short answer: Because in Em, the B7 chord functions as a leading chord called a "dominant 7th" chord and those tend to always be major chords rather than minor chords. The Long Answer: "I wanted to find the chords to play it in Em, so I found out that Em is the relative minor of G". Yes it is, BUT while the key signature is the same between Em and G there is one BIG difference between chords in the key of Em and chords in the key of G. Here it is... the 5 chord (V) in the key of Em is a B7. continuing... "So finding this out I came up with these chords for the key of Em, Em, F# (this one confused me), G, Am, Bm, C, D. I can now play the chords to the Godfather the only problem is the Bm didn't fit into the chords and I discovered that B7 did." You are exactly correct! The reason B7 sounded correct and Bm didn't is because the B7 was "functioning" as the 5 (V) chord, the dominant seventh chord, in the key of Em. And V chords always lead to I chords (whether they are major or minor, it doesn't matter.) For example, in the key of G major the five chord is a D7 and so you'll see a lot of D7-G progressions. But, in the key of Em, the five chord is a B7, because the five chord is leading back to the minor one, so you'll see a lot of B7-Em progressions. Five (V) chords are always a major triad and a flatted seventh. I apologize for the in-depth answer. This may all be way over your head where you are at currently in Session 9. You've stumbled upon a pretty complex harmonic concept that isn't going to make sense until you have learned a few more musical concepts. So, the chords in a minor key are adjusted a bit from their pure relative key counterparts to accomodate for this B7 problem. The chord in the key of Em would be... Em (E-G-B ) F#diminished (F#-A-C) G (G-B-D) Am (A-C-E) B7 (B-D#-F#-A) C (C-E-G) D (D-F#-A) QUESTION 4 - WHY IS THE F# CHORD A "DIMINISHED 7th" or a HALF-DIMINISHED 7th? and WHICH SHOULD IT BE? final question is... "So please can you tell me why this is and whats going on with that F#..." The short answer: In a minor key, the ii chord is customarily played as a half-diminished. The long answer: I don't really know why this is musically or how it can be explained harmonically, but this is just how music has developed. In a minor key, the ii chord tends to always be played as a half-diminished chord rather than a fully-diminished chord. I think part of the reason may be that ii chords tend to move to V chords which tend to move to i chords. And in this ii-V-i progression a ii fully diminished chord just doesn't sound very good. So, in the Godfather in Em, the ii chord would be F# half-diminished 7 which is F#-A-C#-E (1-b3-b5-b7) I hope this clarifies some things. Here are the things you need to remember from all of this. 1) In minor keys, the V chord is major. 2) In minor keys, the ii chord customarily is played as a half-diminished chord.
  19. FIGURING OUT CHORDS There are quite a few ways to tackle identifying chords in songs... some more helpful than others. Let's have a look at a few of them. Using Bass Notes Listening for bass notes is, to me, the easiest way to identify chords. Since the role of the bass in pop in rock music is generally to lay down the foundation of the music, and play the root (primary note) of most chords, all the information we need to identify chords can often be found in the bass part. Try this: • pick a song that sounds relatively simple to play - one that doesn't move too quickly, and uses a basic strummed guitar part. • now, listen to the guitar part, and identify when the chords are changing in the song. • try to identify the bass part. The bass part in pop and rock music usually contains single notes, and is the lowest sounding instrument in the band. • using your guitar, try and identify what note the bassist plays when the guitar chord changes. Slide your finger up the sixth string of your guitar, and try every note, until you find one that sounds like the recording. • identify that note (eg. eighth fret on sixth string is a C) • try playing different types of C chords (Cmajor, Cminor, C7, etc) at that point in the song • when you find the right chord, move on to the next chord change This is a pretty solid method of figuring out songs, although several problems arise. Sometimes, bass players don't play the root note of the chord... for example, they may play the note E, when the chord is actually Cmajor. In time, you'll learn to identify these sounds immediately, but in the beginning, these sort of situations will certainly cause you some anguish. Suck it up! Identifying Open Strings This technique is particularly handy when you have tried the bass note method of figuring out a chord, and failed miserably. Hope you've been honing your skills at hearing open strings ringing, because it comes in handy here too! The concept is simple: listen for any open strings ringing in the recording, then find those same strings on your guitar. Now, rack your brain to remember all the chords you know that use those open strings, and try all of them, until you've found the proper chord. For example, if you were able to detect the open G and B strings ringing in the guitar part you were listening to, the chord could be an open G major chord, or an open E minor chord (actually, it could be a whole lot of chords, but we're keeping it simple here!) You would then try both chords, to see which one sounded correct. Note by Note Method This is admittedly a laborious method of figuring out chords, but sometimes, it's a necessary evil. The concept is simple... simply listen to the chord on the recording again and again, picking out any notes you can hear, and trying to replicate them on guitar. If you're lucky, after you get a couple notes, you'll recognize the chord. Sometimes, however, you just won't know the chord at all, so you have to put it together one note at a time. This can be extremely frustrating, but hey, no one promised this would be easy! And have faith that, while you're working, you're also training your ear, so next time, it will be a little easier. With just a little bit of knowledge, we can also make it mucheasier to anticipate what the chord *could* be, without even picking up a guitar to try and figure it out. We'll finish up by using basic theory to help figure out songs. The phrase "music theory" strikes terror into the hearts of many amateur musicians, and budding musicians the world over. Don't let those words scare you... while many think music theory is nothing but a bunch of dry, boring rules, the truth is, knowing some music theory can make your job as a guitarist much easier. Let's have a look at how knowing some theory can make figuring out songs much easier. Chords in a Key Let's get some straight facts out of the way first. There are 12 major keys, one for every letter of the musical alphabet (eg. Amajor, Bbmajor, Bmajor, Cmajor, etc.) Similarly, there are 12 minor keys (eg. Aminor, Bbminor, Bminor, etc.) A set of chords belongs to each of these keys. A song doesn't have to remain in one key... in fact, jazz and classical music very rarely stays in one key. Now, the good news. Almost all pop, country, rock, and blues music stays in one key throughout. Additionally, most of the music in these styles are written in the key of Cmajor, Dmajor, Gmajor, Amajor, Eminor, or Aminor. Why, you ask? Because the chords in these keys are easier to play on guitar, so songwriters tend to stick with them. Who wants to write a song in Dbmajor, and play a bunch of Db, Gb, and Ab chords when you could instead write the song in Dmajor and play D, G, and A? Explaining the chords in the following chart goes way beyond the scope of this article. Instead, attempt to do the following: • find out which key the song you're trying to figure out is in • Reference the below chart for that key, and see what chords are available (the key is highlighted in black - all chords beside it are the chords available in that key). • Experiment with the available chords in that key, until you find the correct one MAJOR KEYS I ii iii IV V vi vii bVII * C Dm Em F G Am Bdim Bb D Em F#m G A Bm C#dim C E F#m G#m A B C#m D#dim D F Gm Am Bb C Dm Edim Eb G Am Bm C D Em F#dim F A Bm C#m D E F#m G#dim G * this chord doesn't actually belong in the key, but is very commonly used MINOR KEYS i ii III iv v or V VI VII Am Bdim C Dm Em or E F G Dm Edim F Gm Am or A Bb C Em F#dim G Am Bm or B C D I can hear many of you asking "but.. how do I figure out what key the song is in?" Several ways... you could look at a couple chords in the song you know, look in the chart above, and see which key has those chords in it. Another simpler, very inaccurate method of guessing which key a song is in, is to assume the first chord in the song is the correct key. So, if the first chord in the song is an Eminor, you would guess that the song is in Eminor. While there is absolutely no theoretical reason for this to be true, most pop/rock music is rather simple, so it tends to be true more often than not. So there you have it... a good basis for learning to figure out songs on your own. It will be a slow going process at first, but if you try a little each day, I think you'll find that within a few weeks, you'll have learned a whole lot. For those interested in learning more about music theory, I can't recommend the excellent Mark Levine's excellent Jazz Theory Book highly enough. The book begins at a rudimentary level, and provides as much music theory as most people would care to know. The package delivered may be different than the one your receive, standard that things change over time. but since I have a few minutes spare I'll type it for you... Sessions: This course is broken into twenty "Session". Each Session builds upon the previous one, so it's generally best to follow them in order. Both guitar and musical concepts are introduced in a simple logical sequence. ----- Practice Time: For most students, twenty to thirty minutes of practice time five days a week is a good pace. Student will typically spend tow to three weeks on each Session before they are ready to move on. You will find an "Estimated Time to Learn" printed in your Lesson Book at the start of each new Session. These are estimates only and will vary widely. Work at your own pace. ---- The DVD's On the DVDs, each Session will have an extensive instruction time followed by a shorter workshop time. The concepts are first explained in the instruction time, and then you practice them in the workshop. It is not necessary to watch the instruction portion repeatedly each day. Once you have the concepts down, go straight to the workshop for your practice times. ---- The Workshop Time The workshop portion of each Session is meant to be used during your daily practice time. We will cover together the concepts discussed. Generally the workshop times will be 10-15 minutes in length and will practice the main points of the session. When you have a few minutes and are ready to practice, turn on the workshop and we will go over the material together, starting slowly and gradually progressing to where you need to be before moving on to the next section. --- The Lesson Book Your Lesson Book contains all of the songs, examples and exercises that appear on the DVD's. Follow along in the book as you watch the DVDs, take notes in it, and use it any time you don't want to practice in front of the television. You will also use it when practicing with the Jan Along CDs. --- Jam Along CDs: This is the fun part! The Jam Along CDs contain recordings of all the songs you will be learning in this course. Practice by playing along with the guitar part. You will notice that the guitar has been recorded in the left channel, so you can turn it down by adjusting the balance on your stereo. Once you do, you'll be "Jamming Along" with the band all on your own! --- Members-Only Website: More resources, bonus exercises and a discussion board for posting questions is available to you at w w w .. forum changed names [dot] com here. Don't miss this tremendous new resource available to you at no cost. And Finally.... A word of encouragement. You may have realized that it is likely to take a full year to get through all of these Sessions. That probably seems like a long time, but keep this in mind: You will become a guitar player long before you actually finish this course. You will be playing your first songs within a few weeks. A few weeks more and you'll have some basic chords. Within a few months, you'll be able to play most of the songs you hear on the radio. The "mastery" part of the Learn and Master Guitar does take a bit longer, but by then you will probably be having so much fun that the time won't matter. Of course, you may also choose not to go much beyond the basics. That's ok, too. Guitar "master" may or may not be your goal. Whatever your destination is, focus on enjoying the process. Take one step at a time, and above all else. Have fun with it.
  20. This was actually a response in another thread but I wanted to repost it here. As long as we're discussing teaching philosophy let me put on my philosophers hat and chime in. These are some thoughts that have been rolling around in my head for a while. LEARNERS NEED A PATH There is no shortage of tips, tricks, youtube videos, and the like for guitar instruction - each gving a piece or a particular players view on a very specific topic. What is lacking is the "path". There is no way to collect the information from its variety of sources, apply it across a wide variety of musical settings and incorporate it into your playing. We have become musical "hoarders", with little scraps of information cluttering our musical house - a song intro here, a blues lick there, a few chord forms over there. All scribbled down in our musical minds with the best of intentions and then, for lack of a better place to put it, stuffed in our proverbial guitar case. People need the path. The path of systematizing the information IS the important part, otherwise all of the other disorganized information is musically useless to the learner. The mountain climber at the bottom of the mountain knows what needs to be done. And there are a million ways to get to the top - some easier and some harder. What he needs is the sherpa guide to come alongside and say "Start here. Then go up to that point and I'll tell you where to step next when you get there." LEARNERS NEED A COACH Blurting out information is the easy part of teaching. Way too many teachers (musical and otherwise) think their responsibility is to spew out information all over their students and then its the students job to take it all, assimilate it, and apply it. WRONG. WRONG. WRONG. If you've ever sat, completely lost, in a college lecture hall while a teacher endlessly spews out information with no concern for the students learning then you know exactly what I'm talking about. Teaching by information only is lazy teaching. The great basketball coach John Wooden said "You have not taught until they have learned." The teacher's responsibility isn't to pour out information. The teacher's responsibility is to make sure the student has learned the material. When the studen't understanding is your ultimate goal, then you change drastically how you teach. Teaching is hard work. It is figuring out which key will open a particular students understanding. It takes trial and error, endless refinement of the order and flow of information, and the ability to assess and anticipate the problems that the learner will encounter. A coach doesn't just toss the rulebook at the players and then sit on the sidelines. A coach is running along side the player as they are practicing, speaking to them in their ear right at the moment of decision saying "Don't look here, look there. Recieve the ball like this, not like that. Pay attention to this. Wait for it... now Go, Go, Go". The information is the easy part, it's the coaching that takes great skill to take a learner from one point in their development to a completely different place. TRUE LEARNING IS HARD WORK There's no getting around it. If all you do is watch YouTube Guitar Tip videos then you'll be constantly frustrated at why, even though you have the information, you can't make it sound like the guy in the video. The difference is the three months of practice that it takes to master the skill. I love the Extreme Makeover weight loss shows. There was even a new one a few months back where they would take an incredibly overweight person and get them all the way to the big reveal, clapping moment with their families. It was actually a year's worth of this person's life compressed into one hour - from the fat slob eating a cake on the couch to the crisp, trim athlete stepping out from behind the curtain to the cheers of their families. You never saw the hundreds of days of sweat and struggle. The tears, the "I can't do it anymore", the " "who cares about this anyway", the times where the trainer is screaming into the sweaty face of the person saying "Quitting is easy. If you really want to change, you've got to fight for it." When you bleach out the "hard work" from the becoming a musician process, it doesn't work. Learners end up being confused at why things aren't coming easy for them. LEARNING IS PERSONAL We've sold a gazillion courses. And, more times than I can remember, I have sat in my chair in the video studio with the director counting down "3...2...1... action" and I think to myself "Don't worry about the thousands of people who are going to be watching this. Don't worry about them. Talk to the one person who is sitting there with their guitar trying to learn. Help that person. Don't worry about the thousands of other on-lookers." As all of you know, learning is a profoundly personal process. Yes, it is the acquisition of information and skill. But it is also the very personal struggle to become something that you've always wanted to be - doing something that you (in the deepest part of you) truly wants to do for you, not for someone else. It's getting up and practicing when you would rather be doing something else. But you practice anyway because, deep inside of yourself, you want to become a musician. Learning is personal and my job as the instructor is to relate to you in that way. THE G.A.D. FACTOR One of my marketing professors in college said this quote that has bothered me ever since... "Once you can fake sincerity, the rest is easy." What a wretched way to view interacting with people. I was talking with Greg Voros on the back dock of Gruhn's guitars several years ago and he was telling me something about how this or that person stands out in their work because they actually care about what they do or, as Greg so eloquently put it, they "Give A darn" (G.A.D). Phony-ness is so prevelant in our worlds that when someone, even in the smallest of things, actually let's you know that they actually care about what's going on with you, it's shocking to most of us. It's much easier to create a guitar course by just figuring out a few licks, turning on the camera, tossing out some information, cutting a few problematic production corners like creating a book or "on-screen" graphics, and releasing it. Most people will still buy it (at least the first time) so why bother with doing more. The only person that will know that we cut this or that corner will be the poor guy sitting there with his guitar trying to follow along. The G.A.D. factor makes all of the difference in the world, in every decision that is made, in the way the product is produced and marketed. The teacher doesn't have to be the greatest guitar player on the planet. But if the teacher is going to be long-term effective they have to care deeply about the end-result of their teaching to the learner, in other words, they have to "give a darn" because it affects a thousand decisions every day. So, there are some of the dusty thoughts in my guitar teachers mind. You all are the best students in the world and I'm honored with the humbling responsibility to help you out any way that I can. We'll both keep learning together and hopefully make a little music on the way.

About us

Guitar Gathering is a community of guitar lovers of all types and skill levels.  This is a place of learning, support and encouragement.  We are unapologetically positive.

If you've come here to gripe, demean others or talk politics then this isn't the place for you.

But if you've come to talk guitars, ask questions and learn from professionals and guitar learners from all over the world then come on in!

Get in touch

Follow us

facebook feed

Recent tweets

×
×
  • Create New...